There’s nothing more satisfying than seeing a new tile floor come together. The patterns, the shine, the clean lines. But there’s one small step that can make or break that flawless look: timing your grout cleaning just right.
If you’ve ever wondered how long to let grout dry before sponging, you’re not alone. This simple yet crucial detail often determines whether your floor ends up looking professional or patchy.
Let’s break down exactly how long you should wait, why it matters, and how to avoid the common mistakes that can ruin a perfect tile job.
Understanding Grout and Its Curing Process
Before we talk timing, it helps to understand what grout actually is. Grout is a mixture of cement, water, and sometimes sand or polymers, designed to fill the spaces between tiles. Once applied, it starts a chemical process called curing, during which moisture evaporates and the material hardens.
There are two main types of grout:
- Cement-based grout (the most common for residential use)
- Epoxy grout, which is more durable and water-resistant, but sets more quickly
The setting process begins as soon as grout is spread. Sponging too early can pull it out of the joints, while waiting too long can make cleanup extremely difficult.
According to the Tile Council of North America (TCNA), grout typically needs 15 to 30 minutes to set before you start wiping. Though this varies depending on the product, room temperature, and humidity levels. That’s a good general rule, but as any professional cleaner will tell you, conditions matter just as much as the clock.
RELATED: Can You Clean Grout Yourself
So, How Long Should You Let Grout Dry Before Sponging?
The sweet spot for most grout applications is 15-30 minutes after spreading. By this time, the grout should have started to harden, but still be pliable enough for light cleanup.
Here’s how to know when it’s ready:
- Touch test: Lightly touch the grout with your fingertip. It should feel firm but slightly tacky — not wet or runny.
- Color test: The surface of the grout should appear dull, not glossy or shiny.
For cement-based grout, start cleaning after 15–30 minutes.
For epoxy grout, you may need to wait up to 60 minutes, as it sets faster but stays workable longer.
If you sponge too soon, you risk washing out the joints or diluting the color. If you wait too long, a cloudy film known as grout haze can form on the tiles and that can be stubborn to remove later.
RELATED: How Long Does Professional Grout Cleaning Take
Factors That Affect Grout Drying Time
Several environmental and material factors influence how quickly your grout sets. Understanding these can help you adjust your timing for best results.
1. Temperature and Humidity
Warm, dry air speeds up curing. Cool or humid environments (like coastal Florida) can extend drying time significantly. If you’re working in a humid climate, expect to wait closer to 30–40 minutes before sponging.
2. Tile Material
Porous tiles (like unglazed ceramic or natural stone) absorb moisture from the grout, causing it to firm up faster. Nonporous tiles (like porcelain or glass) may require more time.
3. Grout Thickness
Deeper joints or wider grout lines hold more material and take longer to firm up. Always adjust your timing based on joint depth.
4. Ventilation
Good airflow helps moisture evaporate evenly. Use fans or open windows to encourage drying, but avoid direct air blasts that could cause uneven curing.
Pro Tip: In Florida’s humid climate, running a dehumidifier in the room during and after grouting can help maintain consistent drying conditions.
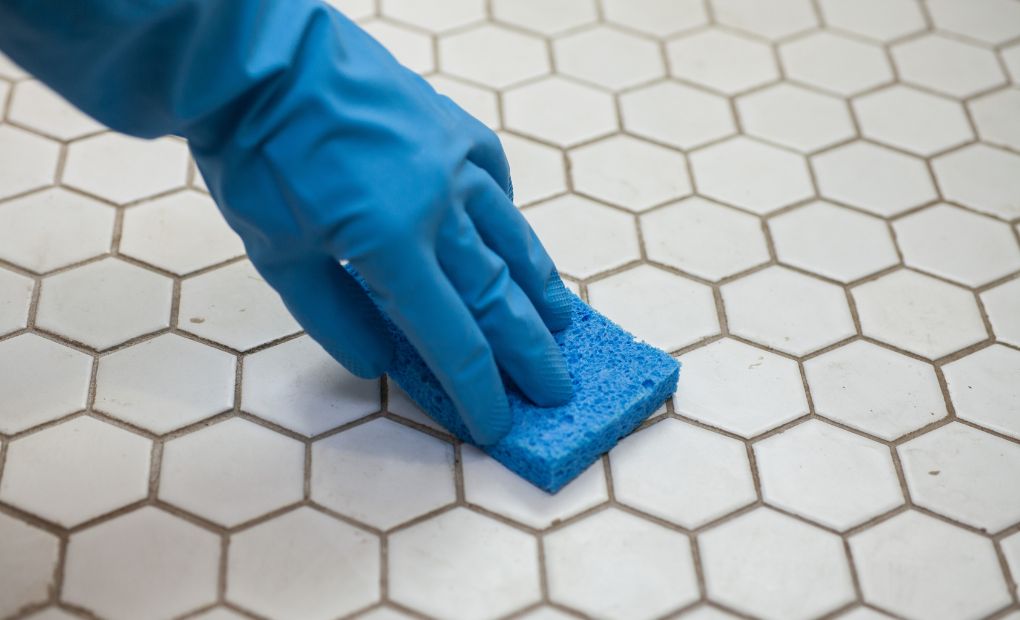
Step-by-Step: How to Sponge Grout Properly
Once your grout has set for the right amount of time, here’s how to sponge it clean without ruining your hard work:
Step 1: Prepare Your Materials
Fill a bucket with clean, cool water and grab a soft, damp sponge, not soaking wet. You’ll also want a second bucket for rinsing to prevent haze.
Step 2: Work in Small Sections
Only grout an area of about 10–20 square feet at a time. This ensures the grout doesn’t over-dry before you clean it.
Step 3: Start Sponging
Hold your sponge flat and wipe diagonally across the tiles. This minimizes the chance of digging grout out of the joints. Rinse your sponge frequently in clean water.
Step 4: Change Water Often
Dirty rinse water can spread grout residue instead of removing it. Replace water as soon as it starts to look cloudy.
Step 5: Final Buffing
After an hour or so, when the tiles are dry to the touch, use a soft microfiber cloth to buff away any remaining haze.
For large areas or delicate tiles, hiring professional floor cleaning services from Florida Floor Washers ensures a streak-free, residue-free finish. Our equipment and techniques are designed to handle even the toughest grout haze safely.
READ: What Do Professionals Clean Tile and Grout With
Common Sponge Grout Mistakes to Avoid
Even experienced DIYers can make these missteps:
- Sponging too early: Pulls grout from the joints and weakens the bond.
- Using too much water: Excess moisture can dilute the grout color and reduce strength.
- Not rinsing the sponge enough: Spreads a thin film of grout across tiles that becomes haze later.
- Waiting too long: Once grout haze dries, it can be difficult to remove without special cleaners.
- Skipping the final wipe: Always check after an hour to ensure no residue remains.
READ: Do’s and Don’ts of Tile Grout Cleaning
Expert Tips for Cleaner, Faster Results
If you want a professional-grade finish, these small habits make a big difference:
- Work methodically: Don’t rush the process — grout small sections and clean as you go.
- Keep temperature steady: Aim for around 70°F (21°C) in the room to encourage even drying.
- Use two buckets: One for rinsing, one for clean water. This simple trick prevents haze buildup.
- Don’t overwork the joints: Gentle diagonal strokes are enough — scrubbing can loosen the grout.
- Call in the pros: Companies like Florida Floor Washers specialize in floor cleaning and grout restoration throughout Jacksonville, FL. They use industry-grade cleaning systems that remove haze efficiently without damaging tile surfaces.
READ: Can You Grout Over Grout
How Long to Wait Before Full Use or Sealing
Even after the grout is sponged clean, it continues to cure beneath the surface.
- Light foot traffic: Wait at least 24 hours.
- Sealing (if applicable): Usually after 48–72 hours, unless the manufacturer specifies otherwise.
This extra patience helps the grout reach maximum strength and durability, protecting your tile installation for years to come.
Quick Facts at a Glance
| Factor | Ideal Condition |
| Wait Time Before Sponging | 15–30 minutes |
| Full Cure Time | 24–72 hours |
| Room Temperature | ~70°F |
| Humidity | Below 60% for best results |
Conclusion
Knowing how long to let grout dry before sponging might seem like a small detail, but it can make a huge difference in how your tile floor looks and lasts. Waiting just the right amount of time (usually 15 to 30 minutes) helps you achieve clean lines, rich color, and a haze-free shine.
If you want to ensure your floors look flawless without the stress or guesswork, let the experts handle it. Florida Floor Washers provides professional floor and grout cleaning services across Jacksonville, FL, using advanced tools and proven techniques to deliver spotless, long-lasting results.
Your floor deserves the best and so does your time.