If you’ve ever spotted cracked or peeling caulk around your tub, sink, or floor edges, you might wonder: can you caulk over old caulk instead of scraping everything off? It’s a fair question. Removing old caulk can be messy and time-consuming, so the idea of just applying a fresh bead on top sounds appealing.
The short answer: yes, you can sometimes caulk over old caulk, but only if the existing layer is in good condition and properly prepared. Otherwise, you risk trapping moisture, promoting mold growth, and shortening the lifespan of your seal.
It’s worth paying attention, too. Moisture issues are a bigger problem than most people realize. According to the U.S. Environmental Protection Agency (EPA), up to 50% of U.S. homes have moisture or mold problems that can lead to costly repairs and health issues. That’s why sealing and maintaining your caulking is such an important part of protecting your home.
Let’s take a closer look at when it’s okay to caulk over old caulk, when you shouldn’t, and how to do it properly.
Understanding What Caulk Does
Caulk is a flexible material used to seal gaps between surfaces. It keeps out water, air, dust, and even insects, making it one of the unsung heroes of home maintenance.
You’ll find caulk most commonly around bathtubs, sinks, showers, baseboards, windows, and countertops – anywhere water or air can sneak in. Over time, even the best caulk starts to fail. Temperature changes, moisture, and movement in walls or floors can cause it to dry out, crack, or separate from the surface.
There are also different kinds of caulk:
- Silicone caulk: waterproof and flexible, great for bathrooms and kitchens.
- Latex or acrylic caulk: paintable and easier to apply, but not as water-resistant.
- Hybrid caulk: combines the best of both durability and flexibility.
Each type has a different lifespan, usually between 5 and 10 years, depending on where it’s used and how well it’s maintained.
READ: Can You Caulk Over Caulk
Can You Actually Caulk Over Old Caulk?
Technically, yes, but there are conditions.
You can apply new caulk over old caulk if:
- The existing caulk is clean, dry, and still firmly attached to the surface.
- The new caulk is compatible with the old one (for instance, silicone on silicone, or latex on latex).
- The surface is free from mold, soap scum, or oil that could prevent adhesion.
If these boxes are checked, you can add a thin bead of new caulk directly on top of the old one for a quick refresh.
However, if the existing caulk is cracked, peeling, moldy, or detached, it’s best to remove it completely. Covering damaged caulk only hides the issue temporarily and when moisture gets trapped underneath, it can lead to hidden mold growth or further cracking.
A quick test: lightly tug on the old caulk. If it flakes off easily or feels soft, it’s time to strip it out before reapplying.
Pros and Cons of Caulking Over Old Caulk
Pros
- Saves time: You can finish the job in half the time compared to full removal.
- Less mess: No scraping, chemical removers, or debris to clean up.
- Useful for minor repairs: Ideal for small, non-critical gaps that don’t face constant water exposure.
Cons
- Shorter lifespan: The new caulk might not bond as securely, reducing its durability.
- Trapped moisture risk: If the old layer hides mildew or water damage, it’ll continue spreading beneath the surface.
- Uneven appearance: Layering caulk can look bulky or sloppy if not applied carefully.
- Difficult future repairs: Once you have two layers, removing them both later is more tedious.
In short: you can caulk over old caulk for minor touch-ups, but it’s not a long-term fix for problem areas.
How to Properly Apply New Caulk Over Old (Step-by-Step)
If the existing caulk passes the condition check, follow these steps for the best results:
- Clean the area thoroughly. Use a household cleaner or a mix of water and white vinegar to remove dirt, mildew, and soap scum. A clean surface is key to proper adhesion.
- Dry the surface completely. Caulk won’t stick to moisture. Wait until the area is completely dry before proceeding.
- Trim uneven edges. Use a utility knife or razor scraper to remove loose bits and smooth rough areas of the old caulk. You want a clean, solid surface for the new layer.
- Check caulk compatibility. Silicone caulk won’t stick to latex and vice versa. Always match the type or use a hybrid caulk designed for bonding over multiple surfaces.
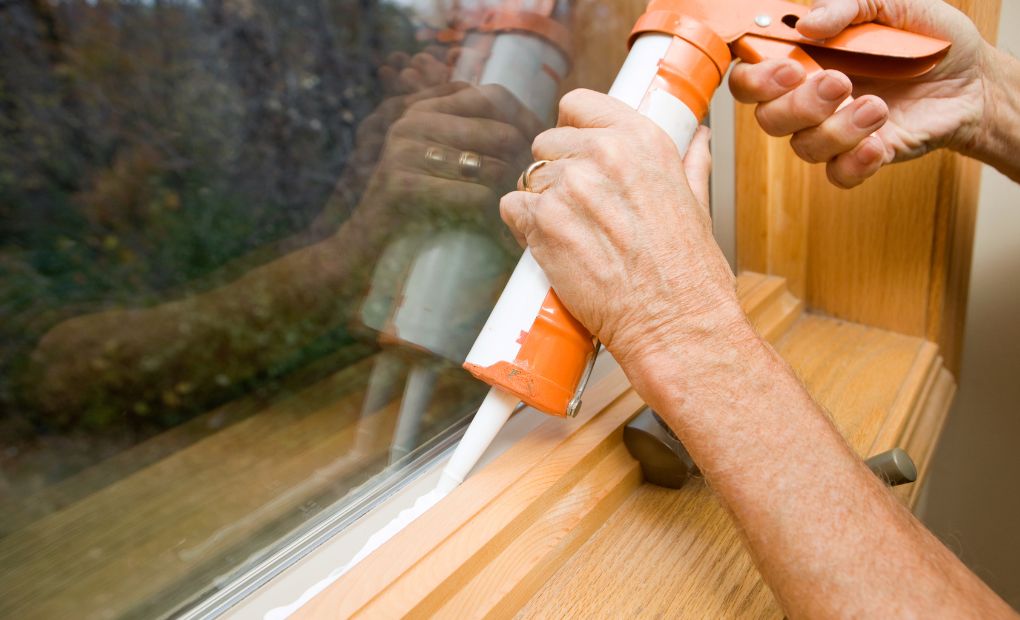
- Apply a new bead of caulk. Cut the nozzle at a 45° angle for precision. Run a steady bead along the joint, maintaining consistent pressure on the trigger. Don’t rush, a smooth application makes a huge difference.
- Smooth the joint. Use a caulk finishing tool or your finger dipped in water to press and shape the new bead. This helps it adhere better and look professional.
- Allow proper curing time. Most caulks require 24 hours to fully cure. Avoid water exposure until it’s set to ensure a watertight seal.
Pro tip: Instead of laying the new caulk directly on top of the old line, apply it slightly to the side or leave a small groove for better adhesion.
When You Should Remove the Old Caulk Instead
Sometimes, there’s just no shortcut. If you notice any of the following, remove the old caulk completely before reapplying:
- Visible mold or mildew that doesn’t clean off.
- Peeling or cracked caulk lines.
- Gaps or separation between the caulk and surface.
- Discoloration or sticky residue.
Removing the old layer ensures the new caulk bonds properly and lasts longer. You can use:
- A caulk remover gel (available at most hardware stores) to soften the old material.
- A caulk removal tool or utility knife to gently scrape it away.
- A heat gun (on a low setting) to loosen hardened silicone.
After removal, clean the area thoroughly and let it dry before applying a fresh bead. Most experts recommend re-caulking every 5–10 years, depending on exposure to water and humidity.
Professional Floor Cleaning vs. DIY
Caulking might seem like a simple DIY job, but doing it wrong can lead to expensive water damage later. If you’re dealing with moldy, damaged, or hard-to-reach areas – especially around showers, tiles, or flooring – it’s best to call in professionals.
At Florida Floor Washers, our floor cleaners Jacksonville specialize in restoring and maintaining floors and surfaces. Our team uses professional-grade equipment and materials to ensure your floors, tile, and caulked areas are properly cleaned and sealed.
We also offer:
- Tile and Grout Cleaning
- Carpet Cleaning
- Hardwood Floor Cleaning
- Concrete Floor Cleaning
- Floor Stripping and Waxing
- Floor Polishing
Whether you need surface cleaning, resealing, or moisture control solutions, we make sure your floors stay durable, hygienic, and beautiful.
Conclusion
So, can you caulk over old caulk? Yes, but only if the old caulk is in good shape, clean, and compatible with your new sealant. Otherwise, removing and reapplying is the smarter move.
Proper caulking doesn’t just make your bathroom or kitchen look better. It protects your home from costly moisture damage and mold.
If you’re in Florida and notice aging or cracked caulk around your tiles or floors, let Florida Floor Washers help. We provide expert floor cleaning and maintenance services that go beyond surface shine, protecting your property from the ground up.